I bought a new keyboard recently: the Lofree Flow 2 with 84 keys (so a 75% layout) in ISO-DE, with keycaps intended for macOS.
At first glance, that sounds like exactly the right combination for me. Compact, mechanical, pleasant to type on, visually clean, and supposedly Mac-friendly. In practice, however, I ran into a surprisingly annoying problem almost immediately.
On the Q key, the keycap shows the @ symbol. That is already slightly misleading, because on this keyboard, that does not behave the way my muscle memory expects on macOS. Under Windows, this sort of placement often makes sense because Alt+Q can produce @. But on macOS, if your fingers are trained differently, things become awkward fast. Even worse: a wrong combination in that area can easily drift into Cmd+Q, which closes the currently active application. That is irritating, but still survivable.
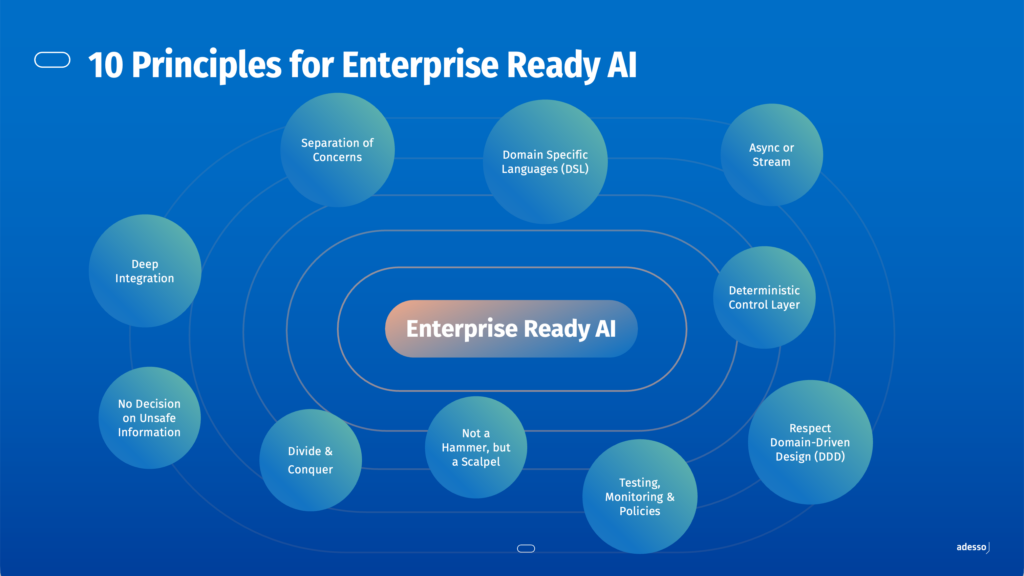
As promised in my “Happy New Year” post, I wrote an article on adesso’s blog that shares how we supercharge enterprise applications with AI: https://www.adesso.de/en/news/blog/code-execution-oder-domain-specific-language-dsl.jsp
We argue that the current wave of agentic AI will only pay off in enterprises if it delivers real efficiency gains without sacrificing security, compliance, and control.
Building on Anthropic’s “Code Mode” idea—compressing many tool calls into on-the-fly, AI-generated code—we propose a safer alternative: “DSL Mode”. The model outputs a workflow in a constrained DSL, and a deterministic interpreter validates and executes it, keeping the execution surface small and auditable.
From there, we outline tool discovery to cut context further and, in some scenarios, use GraphQL as a powerful, well-defined interface that can be kept secure—culminating in ten concrete principles for enterprise-ready agentic systems you can actually run in production.
Exciting 🤓;
This article has been written with help from an LLM, which may make errors (like humans do 😇).
2025 has been challenging due to a third year of recession, yet promising in terms of future opportunities. Fortunately, I found the time to implement several private projects using AI to build little helpers, tools, and games. Some of them made it into this blog, others did not (see below). Furthermore, I had the honor to speak at my home university, TU Dortmund, about GenAI as a tool to improve software and software engineering. This will lead to a full course in 2026, which I will teach together with Prof. Falk Howar. I’m looking forward to that.
Starting in August 2025 (when I wrote my last post), a lot changed for me at work, which makes me look forward optimistically. I pitched internally at my company with a set of architectural principles to enhance enterprise applications with AI. We already did lots of such projects, and these principles combine what we have learned so far. I named this new class of information systems: AI Supercharged Enterprise Applications.
For this new approach, I built a complete application (with AI) that showcases an example architecture (following the principles) as well as use cases for it. This setup offers a variety of new possibilities regarding user experience, automation, degrees of freedom for the user, very efficient modernization paths, and many more. The pitch and demos were very well received, and I got the mandate to further scale up the delivery for building such systems for our customers. I wrote a blog post that will be published on January 5 on the adesso blog, which I will repost here. It gives a glimpse of our forecast regarding the direction of future software systems. More publications are planned for 2026.
But this was not the only change… Shortly after I got this new duty — and first and foremost this new opportunity — I was asked to scale deliveries for Conversational AI as well as the use of GenAI in the Software Development Lifecycle (SDLC), in order to make it better and more efficient and not buggier and harder to understand 🤓 — a risk that should not be underestimated.
As mentioned above, I did some AI-assisted projects in 2025 that I have not described on this blog (if there is interest, please write it in the comments):
Cashier Play (Dec. 2024 – Jan. 2025): A digital cash register that was quite challenging and revealed some limitations of GPT-4o and o1—for example, in writing runtime optimizations—solved by later models.
Home Assistant automation for charging an electric car with surplus energy from a solar power system
Home Assistant automation for spooky Halloween lighting
Home Assistant automation for a sophisticated alarm system
A virtual classroom that allows you to upload exercise sheets as a “teacher”, download, solve, and reupload them as a “pupil”, and proofread and rate them with stars as a teacher
Many little bash scripts for things like preparing large interview files for transcription with gpt4o-transcribe.
So I’m very happy to move forward with these topics at adesso in 2026 🥳. I wanted to share this with you because it gives me the opportunity to build on my background in Model-Driven Software Engineering (MDSE) and push AI in several flavors.
Exciting 🤓;
This article has been written with help from an LLM, which may make errors (like humans do 😇).
On Friday, OpenAI released GPT-5. The release triggered a wave of demonstration videos in which YouTubers showcase GPT-5’s programming skills in pair programming and vibe coding. Many of these examples revolve around creating simple, well-known games – things like flight simulators, Snake, or Angry Birds variants. Such projects exist in hundreds of versions online and are likely also in the AI’s training data. In these cases, 95–99% of the work is handled by existing libraries and frameworks.
Hence, I immediately put it to work in a small home automation project, instead. I wanted to choose an example where it wasn’t about graphics or rendering, but about cleanly implementing logic with some complexity – something that doesn’t exist in identical form all over the internet. An obvious candidate was a small but clear-cut scenario: controlling a small above-ground pool with a pump.
In my last post I gave an introduction to my overall hardware and software setup for backup. But this was the easy part. Backing up several massive Apple Photos libraries—each overflowing with iPhone snapshots, RAW captures from my system camera, videos, panoramas, and AI-generated art—turns out to be a far more complex endeavor than initially anticipated.
For the impatient… You can find the resulting repository, with one iOS solution (which does not completely satisfy my requirements) as well as a macOS solution (which only runs if my MacBook is “awake”, but besides that is an A+), here: https://github.com/juangamnik/apple_photos_backup/
Still with me? Great, let’s dive into the story… Over months of testing, scripting, and wrestling with encrypted storage quirks, a reliable, fully automated solution has finally taken shape. In this post, I’ll walk you through the entire journey: from the early missteps to the final macOS-based workflow that ensures every original file (complete with sidecar and edit metadata) eventually lands safely in an encrypted, deduplicated long-term archive. Whether you’re juggling multiple family libraries or simply want bulletproof Apple Photos backups, I hope this detailed account of trials and triumphs helps you avoid the pitfalls and understand exactly how the tooling works.
Disclaimer: This issue vanishes, if you have a windows or macOS device running 24/7 with enough disk space to deactivate “optimize space”. If true: don’t read 🤓.
By the way: Apple encourages you to backup your iCloud Photos!
In this post I describe how and why I radically overhauled my backup strategy over the past few years – and which alternatives I consciously ruled out. It is written as a journey (what it was), which hopefully gives you helpful insight, whether my decisions could be yours or not (what is ok for me 🤓). I added takeaway sections, for more general insights.
Over the past two weeks, I’ve been following a number of discussions around recent research by Anthropic — the company behind the Claude language model family. These discussions have played out not only in academic circles, but also across social media platforms and YouTube, with science communicators offering their own takes on what the research means.
I noticed that many of these interpretations diverge significantly, sometimes dramatically, from what the papers actually say (and — by the way — from each other). In particular, some claims struck me as exaggerated or speculative, even though they were presented with great confidence and strong rhetorical framing. Others, while more cautious, also made far-reaching conclusions that aren’t necessarily supported by the evidence.
So I decided to take a closer look at the primary sources—the papers themselves—and compare them to some of the circulating interpretations online. My aim here is to share how I read the papers, highlight where I believe common misunderstandings have occurred, and offer a technically grounded perspective that avoids hype, but also doesn’t dismiss the progress that has clearly been made.
More specifically, this post focuses on the following:
A structured recap of the two Anthropic papers and what they actually demonstrate.
A comparison of two popular YouTube interpretations (by Matthew Berman and Sabine Hossenfelder), which offer almost opposing takes.
A short excursion on LLMs and how they work (and why)
My own analysis of why certain assumptions — about self-awareness, internal reasoning, and “honesty” in LLMs — may not be warranted based on the research.
In writing this, I’m not claiming to offer the final word. But I do think it’s important to take a step back from the soundbites and really ask: What do these findings actually show? And what might they not show?
If you’ve found yourself wondering whether LLMs are secretly reasoning behind our backs, or whether it’s just a glorified autocomplete—this post might help you sort signal from noise.
This blog post covers my experience building an Obsidian plugin using ChatGPT – including a minimal backend. The project is open source and available on GitHub:
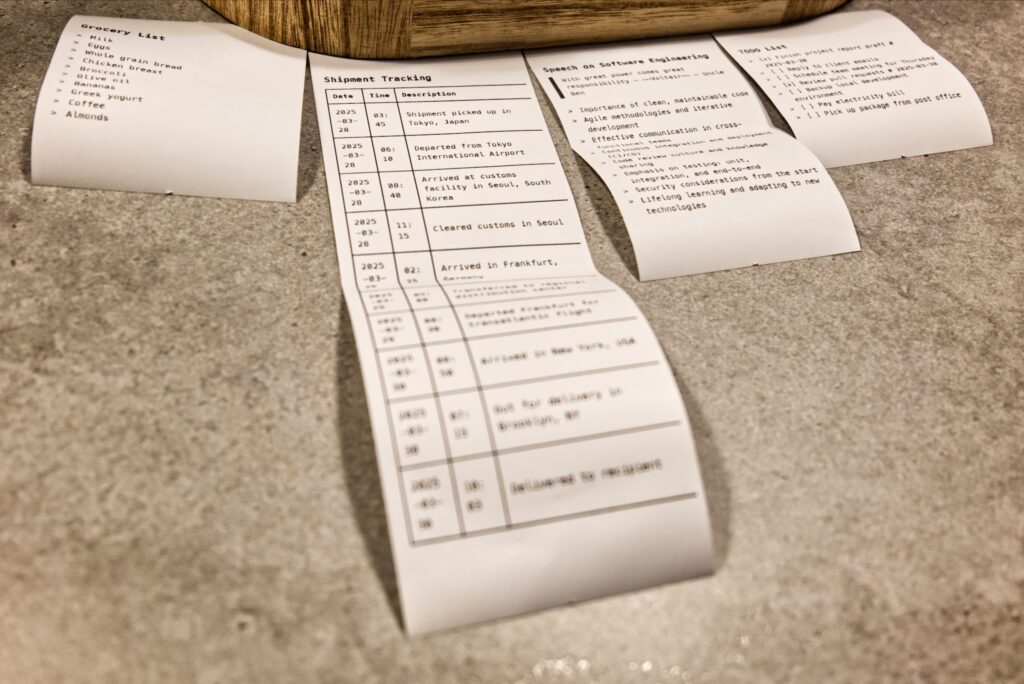
Why that? To solve a real limitation I’ve hit repeatedly. Obsidian on iOS doesn’t support printing or PDF export. That’s an issue, if you want to print short notes, e.g. prep lists for talks, interview questions, or quick todos. To make it even more useful (to me), I don’t print to A4 – I use a thermal receipt printer connected to a Raspberry Pi 4B. It prints on 80 mm continuous paper, ideal for portable, foldable notes that fit in a jacket pocket. Of course, a nice addition would be to support A4, too 🤓.
Do you know the feeling of standing helplessly in front of a technical problem, with modern devices leaving you no room to intervene in the solution because they are closed systems? It feels like you have no control and are at the mercy of the manufacturer. I work in IT myself and have carried out many software projects in various roles throughout my life. Actually, I am not willing— and I also tell all my friends and acquaintances— to help with technical issues on home devices like smartphones, computers, or laptops. My usual saying is: “I’d rather help you move than fix a computer problem.”
But what if it’s your own device to deal with? Then you have to take care of it. Many problems can be solved with extensive Googling or by asking an AI of your choice. I recently encountered an issue with my iPad that turned out to be tricky to fix.
Let me briefly explain the problem: Despite having automatic updates enabled, I hadn’t updated my iPad for a long time. The latest iPadOS version was 18.3.2, but I was still running 16.6.1 without realizing it. That really surprised me. When I tried to manually trigger the update, the iPad downloaded it for a long time, prepared the update even longer, restarted, but remained on the old operating system.
TL;DR: The final solution was to reset the iPad, set it up as a new device, immediately install the update, and then restore it from the last backup. Often, an update fails to complete correctly in a specific system state. By resetting the device, updating to the latest iPadOS version, and then restoring the backup, I was able to resolve the issue.
Many examples, tutorials, and blog posts convey the impression that Python is the only language to do AI. This blog post shows that for enterprise applications, Kotlin with Spring Boot is a very good choice in order to build robust AI and Agentic AI applications.
In today’s fast‑evolving landscape of AI‑driven applications, integrating language models into enterprise solutions is essential. This post explores LangChain4j within a Spring Boot environment using Kotlin. I will demonstrate how to declare AI services using annotations, integrate system prompts, dynamic user prompts, and tools — all via declarative interfaces.